Choosing Custom Architectural Lighting is not merely a matter of selecting attractive fixtures. It requires a careful reading of the building, its users, and its daily rhythms. A lobby may need a welcoming glow, while a gallery demands controlled illumination that protects artwork and reduces glare. Materials matter too. Polished stone reflects sharply, timber absorbs warmth, and glass can expose every lighting mistake.
Richard Kelly, a pioneering architectural lighting designer, described three essential qualities: “focal glow, ambient luminescence, and play of brilliants.” His framework remains useful because it connects visual comfort with architectural character. Effective Custom Architectural Lighting should guide movement, reveal textures, and create visual hierarchy without competing with the structure. It should also support practical needs, including maintenance access, energy performance, color accuracy, and adaptable controls.
Begin with observation. Walk through the space at different hours. Notice where daylight fades first. Watch how shadows move across walls and floors. Then test fixture positions with physical mock-ups, not only computer renderings. A digital model can look perfect.
Real spaces disagree.
A successful scheme balances performance with emotion. Yet the balance is rarely exact on the first attempt. A beam may feel too narrow. A dimming scene may seem cold after installation. These imperfections should invite review, not concealment. Working with qualified lighting designers, architects, and electrical consultants can reduce risks and improve long-term reliability. The best choice considers the entire life of the project, from the first evening impression to years of cleaning, relamping, control updates, and changing user needs.
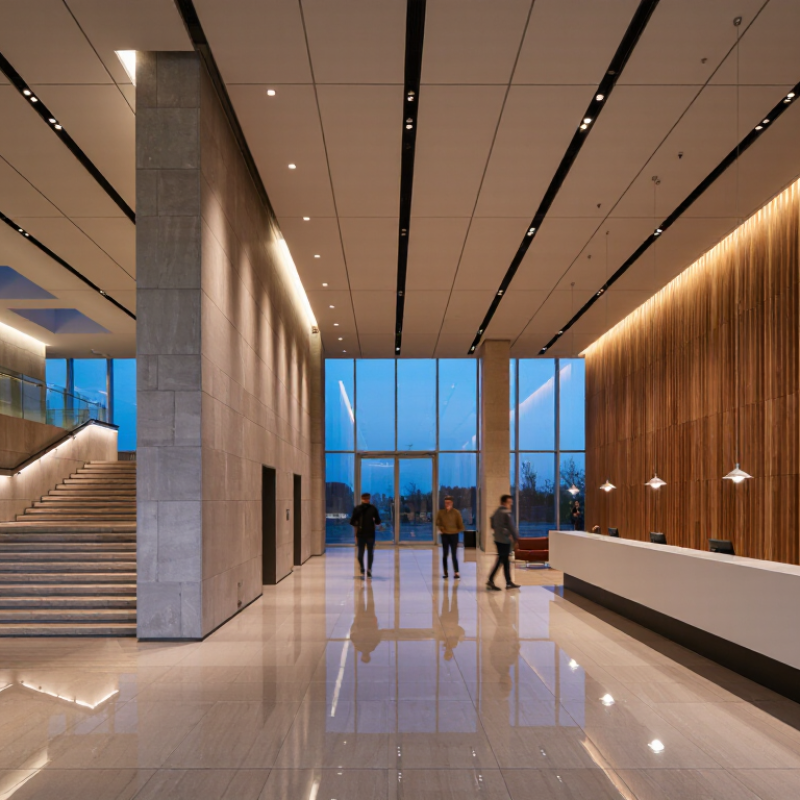
Custom architectural lighting should begin with project requirements, not fixture shapes. Walk through the site before selecting equipment. Record ceiling heights, surface finishes, daylight levels, viewing angles, and maintenance access. Ask how people use each room at 8 a.m., noon, and evening. A gallery needs controlled color accuracy. A hotel lobby may need comfort, orientation, and quiet visual drama. Offices require attention to screen glare and task lighting. These observations turn vague preferences into testable lighting objectives. Write targets for illuminance, color temperature, uniformity, glare control, dimming, and energy use. Applicable local standards and accessibility requirements must guide every decision.
Tips: Create a one-page lighting brief. Name each zone and activity. Set priorities, limits, and a realistic budget. Request sample calculations and a small mock-up. Stand beneath it. Observe shadows on faces, reflections on glass, and brightness transitions. Mock-ups reveal problems drawings hide. Do not trust a beautiful rendering alone.
In my project reviews, the strongest plans connect each objective to a measurable check. Specify who will verify installation, commissioning, and control scenes. Request photometric data, technical documents, warranty terms, and cleaning instructions from suppliers. Keep records of revisions. This protects the original intent when budgets change. Some assumptions will be wrong. A dark ceiling may absorb more light than expected, while polished stone can create distracting reflections. Revisit the plan after finishes are installed. Adjust aiming, dimming levels, or distribution before final approval. Good custom lighting is not simply bright. It supports the building’s purpose, mood, and long-term operation.
How to Choose Custom Architectural Lighting for Your Project
Custom architectural lighting should begin with the building, not a fixture catalogue. Walk through the site at different hours. Observe how sunlight touches floors, ceilings, columns, and textured surfaces. A stone wall may need grazing light, while a polished surface can create uncomfortable reflections. Narrow corridors often require even vertical illumination, not simply brighter ceiling fixtures. Record ceiling heights, structural limits, viewing angles, and available maintenance access. These details shape a practical lighting strategy.
The space must also support real user needs. In a reading area, control glare and provide steady light near work surfaces. In a restaurant, warmer tones may create comfort without hiding food details. Offices need visual clarity, flexible scenes, and adequate contrast around screens. Use measured illuminance, suitable colour rendering, and controlled beam angles rather than relying on appearance alone. Check local standards for emergency lighting, accessibility, energy use, and electrical safety. Reliable documentation matters.
Test important choices with a temporary mock-up. Small changes in aiming can alter a wall’s character completely. Dimming controls should be intuitive for staff, visitors, and maintenance teams. Consider replacement access before closing the ceiling. I once preferred a dramatic narrow beam, but it produced harsh shadows at eye level. The correction was less impressive on paper, yet more comfortable in use. Some decisions need revision. Review the space with actual users before approving the final layout.
Assess architectural features, spaces, and user needs by comparing typical maintained illuminance targets. Higher values support detailed visual tasks, while lower values help preserve atmosphere and visual comfort.
Indicative maintained illuminance levels commonly used in architectural lighting design: circulation areas around 100 lux, entrance and reception spaces around 300 lux, office work areas around 500 lux, retail sales areas around 300 lux, and exhibition spaces around 300 lux. Final values should be verified against the applicable local lighting standard, surface reflectance, daylight availability, glare limits, and the intended user experience.
Custom architectural lighting begins with the project’s visual task, not a fixture catalogue. Choose ambient lighting for calm, even coverage. Use accent lighting to reveal stone texture, artwork, or a stair edge. Add task lighting where people read, cook, work, or navigate. Layering these types prevents a bright ceiling from making the room feel flat.
Material choices affect both appearance and maintenance. Brushed aluminum gives a precise, technical character. Brass can add warmth, but fingerprints and oxidation require attention. Frosted glass softens glare, while clear lenses create sharper beams. The International Energy Agency reports that buildings consume about 30% of global final energy. Efficient LED systems, sensible controls, and replaceable components can reduce unnecessary demand. Energy savings should not excuse poor visual comfort.
Custom design becomes useful when standard dimensions fail. Specify beam angles, color temperature, dimming behavior, mounting details, and emergency requirements early. A 2700K source may suit hospitality interiors, while 3000K often supports offices and retail spaces. These choices need site testing. The Illuminating Engineering Society recommends evaluating illuminance, uniformity, glare, and color quality rather than brightness alone. I have seen attractive concepts fail because drivers were inaccessible or maintenance paths were ignored. That mistake is easy to repeat. Leave room for adjustment. Human behavior, finishes, and daylight rarely match the first drawing.
Custom architectural lighting should be selected through measured performance, not appearance alone. Review delivered illuminance, uniformity, glare, color rendering, flicker, and lumen maintenance. A bright ceiling can still create visual fatigue. On one office project, a lower-output fixture performed better after repositioning and improving wall reflectance.
Energy use deserves equal attention. The 2023 Global Status Report for Buildings and Construction reports that buildings consume about 30% of global final energy and produce roughly 26% of energy-related emissions.
Specify efficient sources, but check the complete installed load, including drivers and controls. The U.S. Department of Energy notes that advanced lighting controls can significantly reduce lighting energy use, although actual savings depend on occupancy patterns and commissioning. That detail is often underestimated.
Use occupancy sensors, daylight dimming, scheduling, and manual override where users need control. Test each scene in the finished space. A control diagram may look perfect on paper. It may frustrate occupants in practice. Verify response time, zoning, sensor coverage, and failure behavior. Compliance also requires more than a certificate. Check the applicable edition of ASHRAE 90.1, local energy codes, emergency-lighting rules, and EN 12464-1 where relevant. Keep photometric files, test records, and commissioning notes. These documents support decisions when the built result differs from the simulation.
Custom architectural lighting succeeds when manufacturing matches the building’s realities. The IEA estimates that lighting uses about 15% of global electricity. Efficiency is therefore a design responsibility, not a late upgrade. During manufacturing, approve a physical sample, finish, driver, optics, and dimming protocol. Record tolerances carefully. A small housing change can affect glare, heat, and ceiling alignment. Leave time for corrections. Perfect drawings are uncommon.
During installation, coordinate access panels, cable routes, lift equipment, and mounting loads with the site team. Test circuits before ceilings close. Measure illuminance, color consistency, emergency operation, and control response after aiming. IES LM-79 supports laboratory photometric testing, while LM-80 helps assess LED lumen maintenance. The U.S. Department of Energy’s 2023 Solid-State Lighting report also stresses controls, interoperability, and verification. These references do not replace field judgment. A room can pass specifications and still feel harsh. Capture scenes, driver addresses, test readings, and photographs in a handover file. Maintenance becomes planned work, not guesswork.
Tips: Request a mock-up at the viewing distance. Check reflections on stone, glass, and polished floors. For exterior work, review CIE 150:2017 for obtrusive light. List cleaning intervals, spare modules, firmware responsibility, and replacement access. Ask who owns future testing. That detail is often missing. Performance may drift. Recheck key areas after three months, then adjust the maintenance schedule using measured conditions.
| Project Stage | Primary Objective | Key Data to Confirm | Recommended Selection Criteria | Coordination Actions | Testing or Acceptance Check | Maintenance Information to Record |
|---|---|---|---|---|---|---|
| 1. Brief and Site Assessment | Define the lighting purpose, visual effect, and site constraints before design begins. | Space use, ceiling height, mounting surfaces, ambient temperature, humidity, dust exposure, operating hours, and available electrical capacity. | Select luminaires according to the environment, required visual comfort, access conditions, and architectural integration—not appearance alone. | Coordinate with the architect, interior designer, electrical engineer, controls designer, and facility team. | Verify that the proposed locations, access zones, driver positions, and cable routes can be accommodated in the architectural and engineering drawings. | Record ceiling types, access panels, lifting requirements, cleaning restrictions, and the person responsible for future servicing. |
| 2. Lighting Performance Criteria | Translate the design intent into measurable performance requirements. | Illuminance target, luminance uniformity, glare control, color temperature, color rendering, beam distribution, dimming range, and emergency-lighting requirements. | Use photometric data suitable for the application. Common color temperatures include approximately 2700–3000 K for warmer interiors and 3500–4000 K for neutral commercial or institutional spaces. | Align lighting calculations with room geometry, surface reflectance, furniture layouts, daylight conditions, and the control strategy. | Compare the approved lighting calculation with measured illuminance and visual-comfort requirements after installation. | Record the approved lamp or LED color specification, optical distribution, dimming method, and replacement-equivalent requirements. |
| 3. Custom Design Development | Convert the architectural concept into a buildable luminaire design. | Overall dimensions, tolerances, materials, finishes, weight, mounting method, heat dissipation, driver location, wiring, and service access. | Prefer designs with replaceable drivers, accessible connection points, suitable thermal management, and finishes compatible with the surrounding materials. | Produce coordinated shop drawings showing sections, fixing details, junction boxes, suspension points, driver locations, and cable entry positions. | Review dimensional coordination, mounting loads, electrical clearances, finish samples, and access for installation and future maintenance. | Specify serviceable components, spare-part references, finish codes, cleaning methods, and approved access procedures. |
| 4. Manufacturing Planning | Ensure that the approved design can be manufactured consistently and delivered on schedule. | Bill of materials, production quantities, material availability, finish requirements, tolerances, packaging dimensions, and required delivery dates. | Confirm that critical components are available, materials are suitable for the environment, and custom finishes can be reproduced across all units. | Freeze approved drawings before production. Identify long-lead items such as custom metalwork, special optics, control gear, and non-standard finishes. | Establish inspection points for dimensions, material thickness, welds or joints, finish quality, labeling, wiring, and functional operation. | Prepare a component schedule listing LED modules, drivers, control devices, connectors, fuses, and replaceable optical parts. |
| 5. Prototype and Sample Approval | Confirm the appearance, performance, construction, and installation method before full production. | Prototype dimensions, light output, color appearance, glare behavior, surface finish, mounting hardware, cable lengths, and driver noise. | Approve a representative sample under relevant viewing conditions and, where possible, at the intended installation height and surrounding finishes. | Distribute a signed approval record to design, manufacturing, electrical, installation, and commissioning teams. | Check the prototype against approved drawings, photometric data, finish samples, control compatibility, and installation tolerances. | Photograph the approved sample and archive its specifications as the reference standard for future replacements or additions. |
| 6. Pre-Installation Coordination | Prevent site conflicts and ensure that the installation team receives complete information. | Delivery sequence, access routes, storage conditions, lifting equipment, ceiling readiness, electrical outlets, control wiring, and work-at-height requirements. | Divide large or fragile assemblies into manageable sections when this reduces handling risk without compromising appearance or performance. | Coordinate reflected ceiling plans, architectural details, structural support, fire-stopping, electrical containment, controls, and other ceiling services. | Confirm that supports are installed, circuits are identified, control cables are tested, and the work area is ready before delivery. | Keep installation manuals, wiring diagrams, spare hardware, touch-up materials, and component labels together with the project records. |
| 7. Delivery and Site Handling | Protect custom luminaires from damage and maintain traceability during transport and storage. | Package identification, unit numbers, delivery condition, storage temperature and humidity, orientation markings, and handling instructions. | Use protective packaging that prevents scratching, deformation, moisture exposure, and movement of fragile optical or decorative parts. | Deliver in installation order and verify that every package matches the packing list, drawings, and room or zone designation. | Inspect for visible damage, missing parts, incorrect finishes, and shipping-related deformation before signing the delivery record. | Retain packaging for delicate components until installation and commissioning are complete, when practical. |
| 8. Installation | Install the luminaires safely, accurately, and in accordance with the approved design. | Mounting height, alignment, suspension points, fixing type, conductor identification, polarity, circuit separation, and control connections. | Use approved supports and fixings appropriate to the substrate and luminaire weight. Do not rely on ceiling finishes alone where structural support is required. | Coordinate installation with ceiling closure, painting, joinery, furniture placement, fire systems, and access equipment. | Inspect alignment, stability, cable management, mechanical security, protective earth continuity, and visible finish quality. | Mark each unit or circuit so maintenance staff can identify it from drawings, labels, or the building management system. |
| 9. Electrical and Controls Testing | Verify that the installed lighting system operates safely and communicates correctly with its controls. | Circuit identification, voltage, protective devices, grounding, insulation condition, dimming response, sensor settings, emergency operation, and control addresses. | Use control components compatible with the specified drivers and confirm that the selected dimming method provides stable operation across the intended range. | Test normal switching, dimming scenes, occupancy sensors, daylight response, time schedules, emergency functions, and integration with other systems. | Complete electrical testing in accordance with applicable local regulations and project specifications. Record defects and corrective actions. | Save final control schedules, addressing information, passwords or access procedures, circuit diagrams, and tested operating scenes. |
| 10. Photometric Commissioning | Confirm that the completed installation delivers the intended visual result. | Measured illuminance, uniformity, glare observations, color consistency, aiming angles, dimming levels, daylight contribution, and nighttime appearance where relevant. | Evaluate the installed system after aiming and focusing, because field conditions, furniture, finishes, and neighboring light sources can affect the result. | Coordinate final aiming with the design team and document any approved changes to fixture position, output level, beam direction, or scene settings. | Compare measurements and observations with the approved design criteria. Obtain written sign-off for completed commissioning. | Record final dimming levels, aiming positions, scene settings, and photographs of representative spaces for future reference. |
| 11. Handover Documentation | Provide the facility team with the information required to operate and maintain the system. | As-built drawings, luminaire schedule, circuit information, control diagrams, test certificates, warranties, cleaning instructions, and spare-parts list. | Require documentation to identify each installed unit, its location, electrical connection, control address, replaceable parts, and approved service method. | Coordinate document reviews among the design team, electrical contractor, controls specialist, installer, and facility representative. | Confirm that the handover package matches the installed condition and includes all approved changes made during construction. | Include recommended inspection intervals, cleaning materials, replacement procedures, safe isolation steps, and escalation contacts by role. |
| 12. Maintenance Planning | Preserve appearance, performance, safety, and energy efficiency throughout the operating life. | Operating hours, environmental exposure, cleaning frequency, access equipment, replacement strategy, spare quantities, and expected control-system updates. | Select maintainable designs with accessible components, standardized connection methods, durable finishes, and replacement parts that meet the original performance criteria. | Schedule routine inspections around occupancy patterns and coordinate planned work with cleaning, ceiling access, controls maintenance, and building operations. | Check for flicker, color shift, failed controls, loose fittings, contamination, damaged finishes, abnormal noise, and changes in light levels. | Maintain an asset register with installation dates, fault history, component replacements, test results, cleaning records, and updated drawings. |
| 13. Performance Review | Use operational data and occupant feedback to improve long-term performance. | Energy use, maintenance hours, failure rates, occupant comfort, complaints, control overrides, and changes in space use or furniture layout. | Adjust scenes, schedules, sensor settings, or aiming only after confirming that the change will not reduce safety, code compliance, or design quality. | Review performance with the facility team at agreed intervals and update operating procedures when the building or tenancy changes. | Repeat selected measurements after major space changes, control modifications, or significant maintenance work. | Use documented findings to update spare-parts quantities, maintenance intervals, training materials, and future project specifications. |
The building determines the lighting strategy. Observe sunlight on floors, ceilings, columns, and textured walls. Record ceiling heights, viewing angles, and maintenance access. A narrow corridor may need even vertical light, not brighter ceiling fixtures.
Reading areas need steady work-surface light with controlled glare. Restaurants may benefit from warmer tones and visible food details. Offices need clear light, screen-friendly contrast, and flexible scenes. Users should test the space before final approval.
Stone walls often suit grazing light. Polished floors and glass can create harsh reflections. Check surfaces from normal viewing positions. Small aiming changes can alter the wall’s appearance dramatically.
A mock-up reveals glare, shadows, reflections, and colour differences. Request it at the actual viewing distance. Paper drawings can miss uncomfortable eye-level shadows. The dramatic option is not always the better option.
Approve a physical sample, finish, driver, optics, and dimming method. Record housing tolerances carefully. A small size change can affect heat, glare, and ceiling alignment. Leave time for corrections. Perfect drawings are uncommon.
Coordinate access panels, cable routes, mounting loads, and lifting equipment. Test circuits before ceilings close. Confirm replacement access early. Otherwise, a simple repair may require major ceiling work.
Measure illuminance, colour consistency, emergency operation, and control response. Test after aiming, not only before installation. Record scenes, driver addresses, readings, and photographs. A room can meet specifications and still feel harsh.
Create a clear handover file and maintenance schedule. List cleaning intervals, spare modules, firmware responsibility, and replacement access. Recheck key areas after three months. Performance may drift. Measured conditions should guide later adjustments.
Choosing Custom Architectural Lighting begins with clearly defining the project’s purpose, atmosphere, budget, timeline, and lighting objectives. Consider the building’s architectural features, room proportions, materials, circulation patterns, and the needs of occupants or visitors. This assessment helps determine the appropriate balance of ambient, task, accent, and decorative lighting while supporting comfort, visibility, and visual appeal.
Next, evaluate suitable lighting types, finishes, materials, mounting methods, and design details that can be tailored to the space. Performance, energy efficiency, controls, safety, accessibility, and applicable building standards should be reviewed before final approval. Close coordination with the manufacturer and project team is also essential to confirm dimensions, prototypes, quality, installation requirements, testing procedures, and long-term maintenance. A well-planned Custom Architectural Lighting solution should integrate seamlessly with the architecture, deliver reliable performance, simplify operation, and maintain its appearance and effectiveness throughout the project’s life.